
Easy Pita Bread Recipe
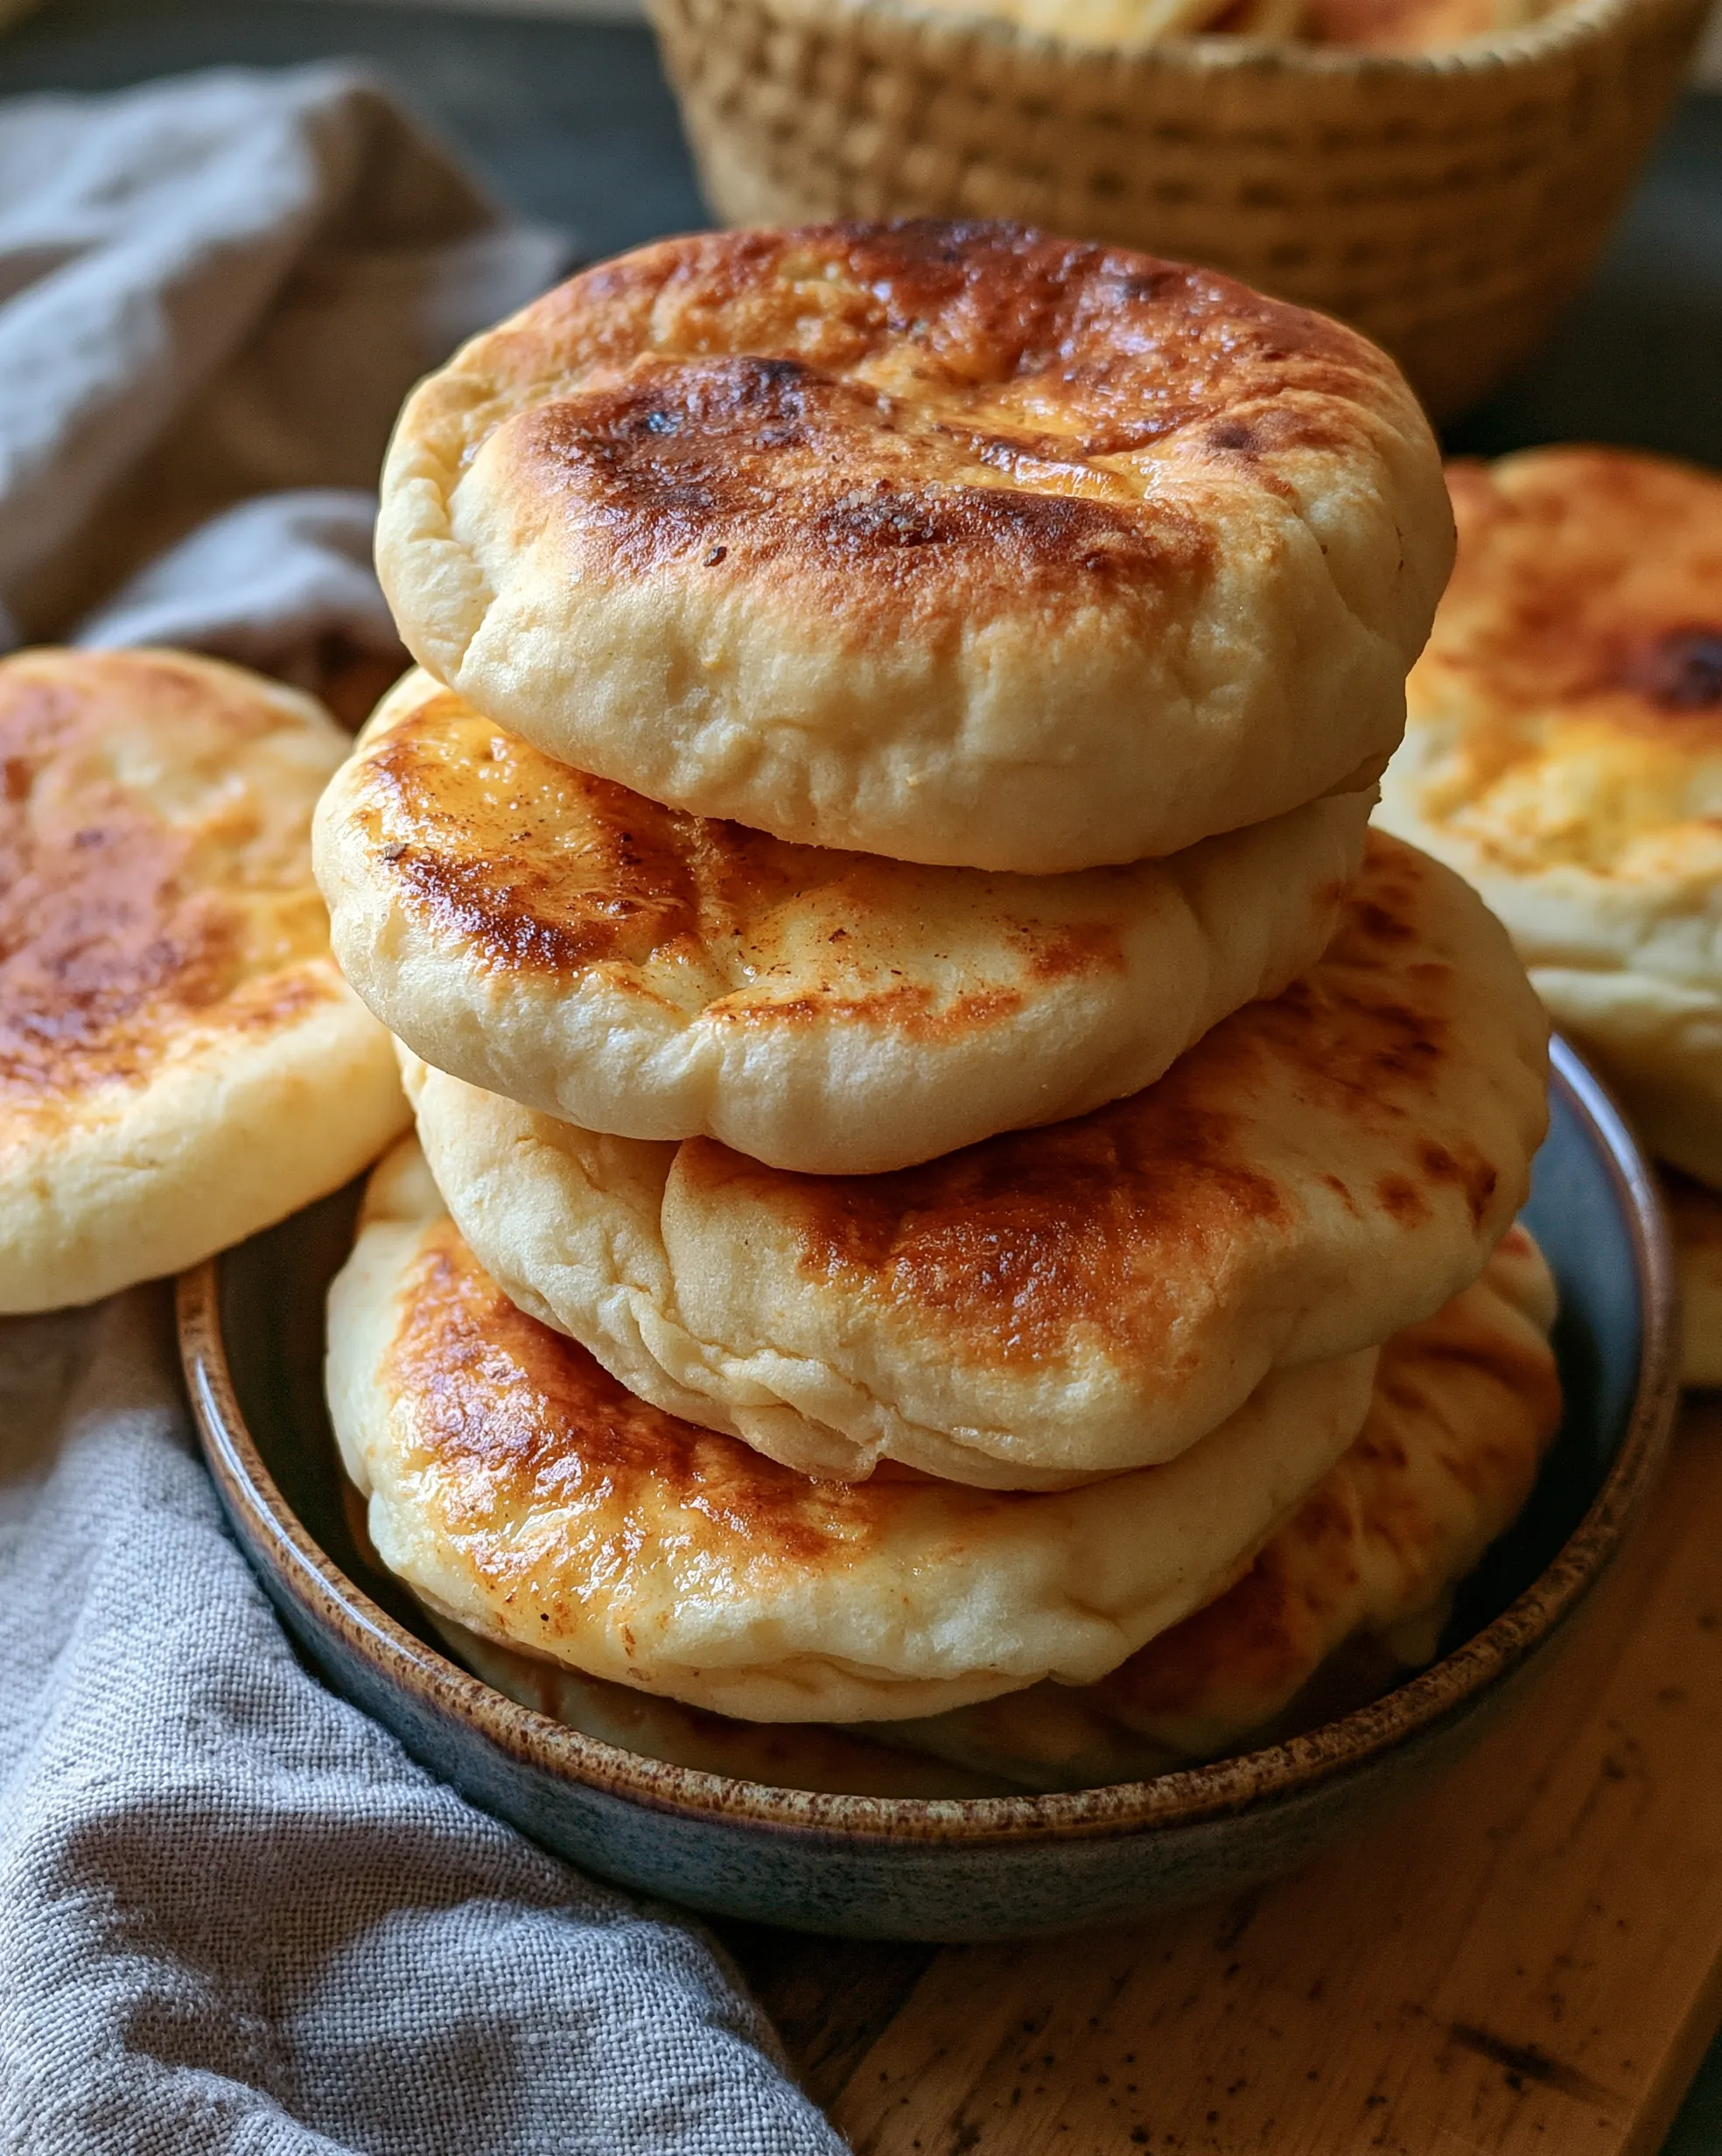
Watching a flat disc of dough balloon into a perfect pillow in a hot skillet might be the most satisfying thirty seconds in all of bread baking. This pita bread recipe gives you that moment eight times in a row — soft, puffy rounds with deep golden toasted spots and pale, tender sides, stacked warm in a towel exactly like the photo. No oven gymnastics, no special pan. Just a cast-iron skillet and a little heat.
Store-bought pita is usually dry, brittle and splits the second you try to stuff it. Homemade pita is a different creature: flexible enough to wrap around grilled chicken, sturdy enough to scoop up hummus without cracking, and — when you catch one still warm — good enough to eat plain, torn into pieces, one after another. The dough is six simple ingredients, the kneading is easy, and once your skillet is hot, each pita cooks in about three minutes. Let me show you how to get a pocket every single time.

Why Homemade Pita Is Worth the (Tiny) Effort
- The puff is real — steam inside the dough blows each round into a true pocket you can actually stuff.
- Six pantry ingredients — flour, water, yeast, sugar, salt, olive oil. That is the whole list.
- Skillet-baked, no oven needed — and that ripping-hot pan is exactly what stamps on the golden toasted patches in the photo.
- Soft and flexible, never brittle — wrapped in a towel as they finish, they stay pliable for wraps, gyros and scooping.
- Faster than most breads — about 2 hours from mixing bowl to warm stack, and most of that is the dough rising on its own.
The Ingredients (Just Six Pantry Staples)
- 1¼ cups (300 ml) warm water — 105–110°F (40–43°C). Warm to the wrist, never hot; hot water is the quiet killer of many good doughs.
- 2 teaspoons instant yeast — or 2¼ teaspoons active dry yeast, bloomed in the warm water for 10 minutes first.
- 1 teaspoon granulated sugar — or honey. It feeds the yeast and helps the finished pitas take on those deep golden spots.
- 3¼ cups (420 g) all-purpose flour, plus more for rolling — bread flour works too and gives a slightly chewier pita. I use all-purpose for the soft look in the photo.
- 1¼ teaspoons fine salt — seasons the dough all the way through; pita without enough salt tastes like a warm napkin.
- 2 tablespoons extra-virgin olive oil, plus a little more for the bowl — keeps the crumb tender and the dough easy to roll.
How to Make It: Roll, Sizzle, Watch It Puff
- Start with a sponge. In a large bowl, whisk the warm water, yeast and sugar with 1 cup of the flour. Cover and rest 15 minutes, until foamy and bubbly. This quick head start wakes the yeast and builds flavor.
- Make the dough. Stir in the remaining flour, the salt and the olive oil until a shaggy dough forms. Knead 6 to 8 minutes by hand (about 5 minutes with a dough hook) until smooth, soft and just slightly tacky — it should feel like a plump earlobe.
- Let it rise. Place the dough in a lightly oiled bowl, turn to coat, cover, and rise in a warm spot for about 1 hour, until doubled. In a cool kitchen, give it up to 1½ hours.
- Divide and rest. Turn the dough onto a floured surface and divide into 8 equal pieces (about 90 g each). Roll each into a smooth ball, cover with a towel, and rest 15 to 20 minutes. Rested dough rolls thin without snapping back — do not skip this.
- Roll the rounds. Working with one ball at a time and keeping the rest covered, roll each into a 6–7 inch (15–18 cm) round, about 1/4 inch (6 mm) thick. Evenness matters more than perfection: aim for the same thickness edge to edge, and flip the dough once or twice as you roll.
- Heat the skillet properly. Set a dry cast-iron skillet over medium-high heat for a full 5 minutes. It should be very hot — a flick of water should sizzle and vanish instantly. No oil in the pan; the dry heat creates the toasted spots.
- Cook and watch it puff. Lay a dough round in the skillet. In 30 to 60 seconds, bubbles will appear on the surface. Flip it, and cook 1 to 2 minutes on the second side — this is when the pita usually balloons into a full pillow. Flip once more for 20 to 30 seconds to finish the spots. If one stubborn corner refuses to puff, press it very gently with a spatula to push the steam there.
- Wrap and repeat. Slide each finished pita straight into a clean kitchen towel and wrap it up — the trapped steam is what keeps the stack soft and bendy. Repeat with the remaining rounds, letting the skillet reheat for a few seconds between each one.
Sofia’s Expert Tips (A Pocket Every Time)
- Heat is the whole secret. The pocket forms because water in the dough flashes to steam faster than it can escape. A lukewarm pan gives you flatbread, not pita. If your first pita refuses to puff, let the pan get hotter before blaming the dough.
- Roll evenly or do not bother rolling thick spots thin later. A thin center with fat edges cooks unevenly and leaks steam through the thin part. Roll from the center outward, quarter-turning as you go.
- Never tear or crease the surface. A crack in the rolled round is a steam vent, and a steam vent means no balloon. Handle the rounds gently and keep your rolling pin floured, not the dough.
- Go easy on flour at the end. Shake or brush off excess flour before the round hits the pan — loose flour scorches in a dry skillet and turns bitter and smoky.
- Do not chase brown. Perfect pita is pale and soft with golden toasted patches, like the photo — not crisp and dark all over. Pale means flexible; the spots give the flavor.
- Cut the pocket after a 2-minute rest. Slice off an edge or halve the pita once it has cooled slightly, and the pocket opens cleanly without tearing the soft walls.
Easy Variations Worth Trying
- Oven method (big batches): heat the oven to 500°F (260°C) with a baking steel or upside-down sheet pan inside for 30 minutes. Bake the rounds directly on the hot steel for 2 to 3 minutes — no flipping. They puff beautifully and you can do two at a time.
- Whole wheat pita: swap half the all-purpose flour for whole wheat flour and add 1 to 2 extra tablespoons of water. Nuttier, heartier, still puffy.
- Garlic herb finish: brush hot pitas with olive oil whisked with a grated garlic clove and shower with chopped parsley. Serve next to anything grilled.
- Za’atar pita: brush the cooked pitas lightly with olive oil and sprinkle with za’atar while warm. Breakfast, snack, side — it does it all.
How to Store, Freeze and Reheat
- Counter: keep the cooled pitas in a sealed bag or wrapped in the towel inside a bag at room temperature for up to 2 days.
- Fridge: up to 4 to 5 days in a sealed bag. They firm up cold — always refresh them before serving (below).
- Freezer: stack with small squares of parchment between the pitas and freeze in a sealed bag for up to 3 months.
- Reheat: sprinkle a pita lightly with water and warm it in a dry skillet for 20 to 30 seconds per side, or wrap a stack in foil and warm at 300°F (150°C) for 5 minutes. Frozen pitas thaw in minutes on the counter, then refresh the same way.
FAQs
Almost always one of four things: the skillet was not hot enough, the round was rolled unevenly, the dough was too dry, or the surface got torn or creased and leaked steam. Heat a cast-iron pan for a full 5 minutes, roll to an even 1/4 inch, and handle the rounds gently. A small bubble or two without a full balloon usually means the pan needs more heat, not a new recipe.
No. Any heavy skillet works if it can hold strong, even heat — stainless steel is fine. A heavy griddle is excellent for making two at a time. You can also use the oven method in the variations: a baking steel at 500°F (260°C) puffs pitas in 2 to 3 minutes with no flipping at all.
Yes. After kneading, cover the dough and refrigerate it for up to 24 hours instead of rising on the counter — the slow, cold rise actually improves the flavor. Let it sit at room temperature for 30 minutes, then divide, rest and roll as written. You can also freeze the dough balls for up to a month; thaw overnight in the fridge before rolling.
They were either cooked too long or left uncovered as they cooled. Pita should come out of the pan pale with golden spots and go straight into a towel — that steam bath is what keeps them supple. If a batch has firmed up, the water-sprinkle-and-warm-skillet refresh in the storage section brings back most of the softness.
Both work. Bread flour gives a chewier bite and slightly stronger puff thanks to the extra protein; all-purpose gives a softer, more tender pita like the ones in the photo. A 50/50 mix is a lovely middle ground. Avoid cake flour — it is too weak to hold the pocket.

Easy Pita Bread Recipe
Course: Side DishCuisine: MediterraneanDifficulty: Easy8
servings20
minutes25
minutes2
hours5
minutesSoft, pillowy homemade pita that balloons into a real pocket in a screaming-hot skillet — pale tender sides, deep golden toasted spots, and just six pantry ingredients.
Ingredients
1¼ cups (300 ml) warm water
2 tsp instant yeast
1 tsp granulated sugar
3¼ cups (420 g) all-purpose flour, plus more for rolling
1¼ tsp fine salt
2 tbsp extra-virgin olive oil, plus a little more for the bowl
Directions
- Whisk warm water, yeast, sugar and 1 cup flour; rest 15 minutes until foamy.
- Stir in remaining flour, salt and olive oil; knead 6–8 minutes until smooth and slightly tacky.
- Rise in an oiled bowl about 1 hour until doubled.
- Divide into 8 pieces, roll into balls, rest 15–20 minutes.
- Roll each into a 6–7 inch round, about ¼ inch thick, keeping thickness even.
- Heat a dry cast-iron skillet over medium-high for 5 minutes until very hot.
- Cook each round: bubbles in 30–60 seconds, flip, 1–2 minutes until it balloons, flip once more 20–30 seconds.
- Wrap each finished pita in a towel and repeat.
Notes
- The pan must be truly hot — 5 full minutes over medium-high — or the pitas will not puff. Roll to an even 1/4-inch thickness, avoid tearing the surface, and wrap each finished pita in a towel immediately so the stack stays soft and flexible.
Save this recipe and make the first warm batch on a weekend — once you have torn into a fresh, steamy pita pocket, the store-bought stack loses its power.
More recipes you’ll love: Easy Garlic Bread Recipe, Easy Focaccia Bread Recipe and Easy Sandwich Bread Recipe.


One Comment